 |
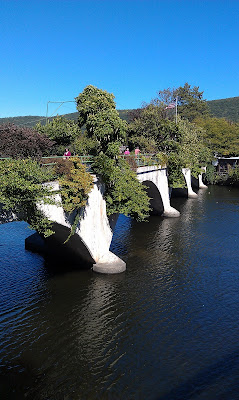
| Bridge of Flowers, Shelburne Falls, MA. |
I returned to Shelburne Falls, MA to take another weaving class at VavStuga, this time "Drawloom Basics," Sept. 17-21, 2012. Arriving early afternoon, first I checked out the Bridge of Flowers.
 |
| Bridge of Flowers, in bloom! |
I had been here last November, and most of the flowers were no long in bloom. This time, the bridge was a riot of color, something you need to see!
 |
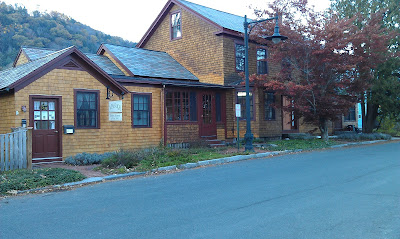
| VavStuga, Shelburne Falls, MA (photo from Nov. 2011). |
I travelled back to VavStuga to take their Drawloom Basics class, September 17-21, 2012. Though we would be weaving off-site, most students stayed and had meals here (see three posts from January 2011 for photos from VavStuga Basics class, including the wonderful accommodations).
 |
| Susan Conover & Becky Ashenden at the start of a VavStuga lunch. |
Breakfast, lunch, and dinner are available at VavStuga and are delicious! Meals are served in the room at the back of the building with a wall of windows looking out onto the river and foothills. At each meal, the table is set with different handwoven runners, placemats, and napkins, making each meal even more special. Conversation and laughter accompany each meal with Becky, Susan, and the apprentice.
Accommodations at VavStuga are very confortable. Each room has handwoven curtains, rugs, blankets, coverlets, and table covers, that make you want to go home and do the same!
During Drawloom Basics, we would have the opportunity to weave on several different types of drawloom setups including opphamta, single unit with lashes, Smalandsvav, shaft draw, and single unit (Myrehed).
 |
| The VavStuga Drawloom Annex (as I call it). |
The drawlooms had previously been set up when needed at VavStuga, but late last year the drawlooms had been moved to a farmhouse (above) about five minutes away, belonging to Becky's father. The looms fill several rooms on the first and second floors in the right side of the farmhouse.
 |
| You can clearly see I am enjoying the week! |
One room has two long tables and chairs, used for lecture, drafting, viewing many, many samples, and where we worked on designing.
 |
| Weekly Schedule. |
 |
| Copy of schedule. |
Becky had prepared a weekly schedule showing what loom each of us would be working on each day, and for how long. A daily schedule was also available. Some projects were allowed 7.5 hours, others were 3.5 hours. Days were broken up with lecture, explanation of looms and how they work, drafting, and designing. It was always a treat to be shown many examples of the different types of weaving done on the various drawloom setups. Photos of those as well as older pieces on display in the rooms were will be in the third post.
The first day began with designing. We could design our own or use a design from any of the many books/charted designs available. I chose a design from a book, and that evening added a border. This design turned out to be the last project I did, on Friday of that week, woven on the drawloom with a Myrehed single unit setup. Photos will be in the next post. More designing went on during the week as well as drafting.
 |
| Loom with "opphamta attachment." |
On Day 2, I started weaving Opphamta, on a loom with a 20 shaft attachment (not all 20 were not tied up and being used). This was a 3.5 hour project. I didn't have much time and may have made an error on my charted design, but this is what I came up with. Opphamta has a ground of plain weave, and the design of floats.
 |
| My weaving, in progress. |
 |
| My weaving after having rolled under the warp as another student was weaving. |
 |
| Single Unit Draw with Lashes. |
My next weaving session was on an Oxaback single unit drawloom with the design we would all weave saved in lashes. This was a BIG loom, heavy, beautiful,... and I found it physically a bit more challenging to weave on simply because I am 5'4", shorter arms and legs, and as I say, this was a big loom. I tried weaving standing up, but that didn't work. Sitting on the bench, I couldn't move the lashes far enough to the back and ended up using the cloth protector piece to push them to the back of the loom. Where there is a will, there is a way!
 |
| Here you see the lashes hanging down and the cords pulled for a particular line on the chart. |
 |
| My view while weaving. |
 |
| Completed "double-dragon" weavings. |
On this loom, because the design was saved in lashes, we all wove the same double-dragon design, linen warp and weft, and name tags on each so we would have our own to take home.
Tomorrow, I'll photograph my weavings, meanwhile, I'll get to work on the photos for Drawloom Basics Class, Part 2.
No comments:
Post a Comment