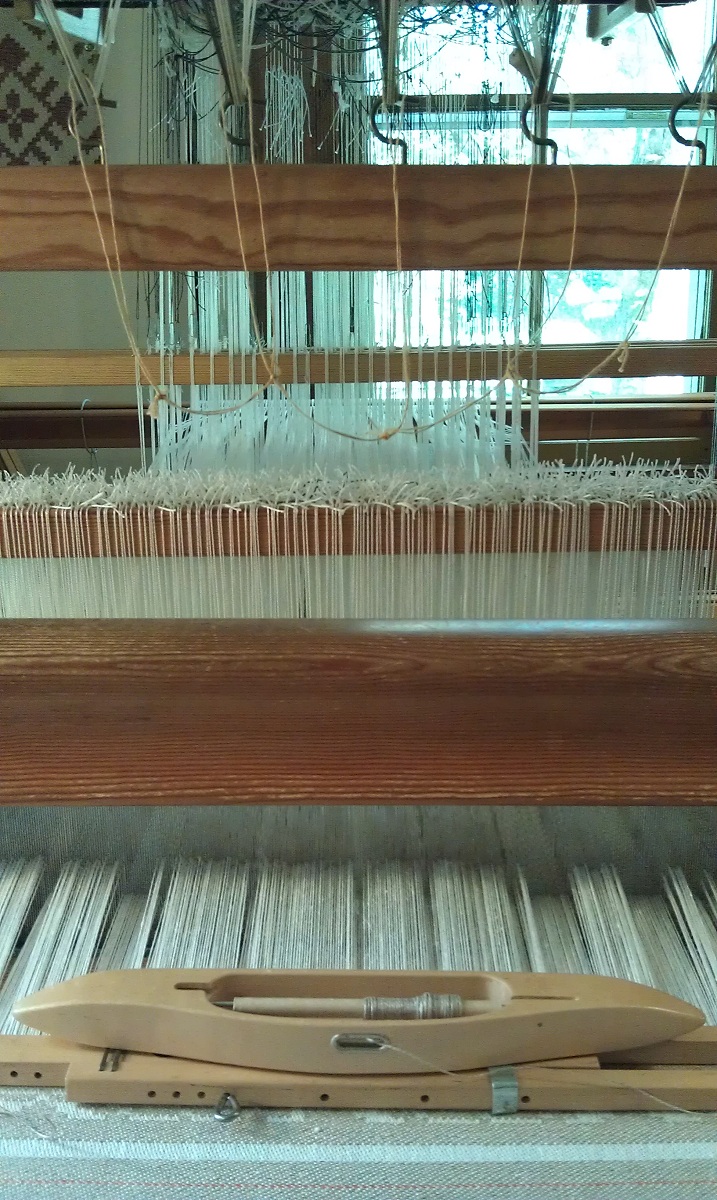
Showing posts with label single unit drawloom. Show all posts

Friday, October 12, 2012

Drawloom Basics Class , Part 1 of 3

Bridge of Flowers, Shelburne Falls, MA.

I returned to Shelburne Falls, MA to take another weaving class at VavStuga, this time "Drawloom Basics," Sept. 17-21, 2012. Arriving early afternoon, first I checked out the Bridge of Flowers.


Bridge of Flowers, in bloom!

I had been here last November, and most of the flowers were no long in bloom. This time, the bridge was a riot of color, something you need to see!

VavStuga, Shelburne Falls, MA (photo from Nov. 2011).

I travelled back to VavStuga to take their Drawloom Basics class, September 17-21, 2012.  Though we would be weaving off-site, most students stayed and had meals here (see three posts from January 2011 for photos from VavStuga Basics class, including the wonderful accommodations).


Susan Conover & Becky Ashenden at the start of a VavStuga lunch.

Breakfast, lunch, and dinner are available at VavStuga and are delicious!  Meals are served in the room at the back of the building with a wall of windows looking out onto the river and foothills.  At each meal, the table is set with different handwoven runners, placemats, and napkins, making each meal even more special.  Conversation and laughter accompany each meal with Becky, Susan, and the apprentice.

Accommodations at VavStuga are very confortable.  Each room has handwoven curtains, rugs, blankets, coverlets, and table covers, that make you want to go home and do the same!

During Drawloom Basics, we would have the opportunity to weave on  several different types of drawloom setups including opphamta, single unit with lashes, Smalandsvav, shaft draw, and single unit (Myrehed).


The VavStuga Drawloom Annex (as I call it).

The drawlooms had previously been set up when needed at VavStuga, but late last year the drawlooms had been moved to a farmhouse (above) about five minutes away, belonging to Becky's father.  The looms fill several rooms on the first and second floors in the right side of the farmhouse.  


You can clearly see I am enjoying the week!

One room has two long tables and chairs, used for lecture, drafting, viewing many, many samples, and where we worked on designing. 


Weekly Schedule.

Copy of schedule.

Becky had prepared a weekly schedule showing what loom each of us would be working on each day, and for how long.  A daily schedule was also available.  Some projects were allowed 7.5 hours, others were 3.5 hours.  Days were broken up with lecture, explanation of looms and how they work, drafting, and designing.  It was always a treat to be shown many examples of the different types of weaving done on the various drawloom setups.  Photos of those as well as older pieces on display in the rooms were will be in the third post.

The first day began with designing.  We could design our own or use a design from any of the many books/charted designs available.  I chose a design from a book, and that evening added a border.  This design turned out to be the last project I did, on Friday of that week, woven on the drawloom with a Myrehed single unit setup.  Photos will be in the next post.  More designing went on during the week as well as drafting.


Loom with "opphamta attachment."

On Day 2, I started weaving Opphamta, on a loom with a 20 shaft attachment (not all 20 were not tied up and being used).  This was a 3.5 hour project.  I didn't have much time and may have made an error on my charted design, but this is what I came up with.  Opphamta has a ground of plain weave, and the design of floats.


My weaving, in progress.

My weaving after having rolled under the warp as another student was weaving.

Single Unit Draw with Lashes.


My next weaving session was on an Oxaback single unit drawloom with the design we would all weave saved in lashes.  This was a BIG loom, heavy, beautiful,... and I found it physically a bit more challenging to weave on simply because I am 5'4", shorter arms and legs, and as I say, this was a big loom.  I tried weaving standing up, but that didn't work.  Sitting on the bench, I couldn't move the lashes far enough to the back and ended up using the cloth protector piece to push them to the back of the loom.  Where there is a will, there is a way!


Here you see the lashes hanging down and the cords pulled for a particular line on the chart. 

My view while weaving.

Completed "double-dragon" weavings.

On this loom, because the design was saved in lashes, we all wove the same double-dragon design, linen warp and weft, and name tags on each so we would have our own to take home.

Tomorrow, I'll photograph my weavings, meanwhile, I'll get to work on the photos for Drawloom Basics Class, Part 2.


Saturday, September 4, 2010

The Journey Continues

If you have been following my journey of getting my drawloom up and working after 18 or so years, you may recall I was re-threading the loom from 8 shaft satin to 5 shaft satin, as I was having trouble with the counterweights not pulling the ground shafts back to neutral.

More than one drawloom weaver advised me to change from an 8 shaft satin to something using 4 or 5 shafts, so the decision was made to change to a 5 shaft satin.

After pulling 1,024 threads of 20/2 cotton out of the long-eye heddles (ground shafts) and maillons (pattern shafts), I was back at the lease sticks to again thread the the loom.

All was going well until I found a maillon with no threads. Disaster! I thought I had been watching so carefully, and now this meant having to yet again re-thread 1/4 of the maillons, then the long-eye heddles, approximately 256 threads. I tried to think if there was a way of moving the pattern heddles around on the pattern shaft bars, but as each pattern heddle was already tied to a drawcord, that would have meant untieing 1/4 of the drawcords, too. I decided against that.


Also unwilling to remove loom parts at this point, it meant bending over the side of the long back extension to re-thread those tiny holes. I should have owned stock in an ibuprophin manufacturing company over the past month! My aching back meant I could only work on this for short stretches at a time.


Above, you can see the size of a maillon and those tiny holes.

Yesterday, I finally finished re-threading the left side of the loom, left of the
center cords. Today, I've been threading the long-eye heddles on the right half of the loom, a job which goes fairly fast, and thankfully, went without incident.


No threading hook is needed, just reach through that large eye with your fingers and pull your warp thread through.

There are 75 threads to go, and as I write this post and load in the photos, I'm on a stepstool moving heddles to the three shafts where I ran short. The re-threading will be completed in just a bit.

Yes, it has taken me quite awhile to reach this point (for the second time!). Yes, I want to weave on this loom sooner than later, but the more important goal is to understand the loom, the processes, what is happening and why (or why not), and figuring out what to do when things don't go as planned. It's been an interesting journey, and I'm looking forward to learning so much more.

Friday, July 17, 2009

Drawloom ~ Beaming the Warp

In my previous post I wrote about making a fine warp on a warping mill. Yesterday, the warp was beamed. It took four hours or more because of an unexpected "problem," but after receiving some advice from other drawloom weavers, it was resolved and things went fairly smoothly.

Details: The warp was 20/2 mercerized cotton, 64 ends per inch, 16" wide, and 18 yards long for a total of 1,024 threads, and 18,432 yards. The warp was made on a warping mill, and made in 4" sections of 256 threads each. I warp back to front.


I should explain, the reason you will see five warp chains in this photo is one day I started making a section, with not enough time to finish. With cats who love nothing better than to play in yarn/thread (or chew through it), I couldn't leave it on the mill, so finished two inches, tied it all off, and removed it, which meant making another two inch section another day. The two on the right are equivalent to the others.

The warp was placed on the back wood rod, each one inch section put in its place in the raddle and held down with rubber bands. Beveled lease sticks were placed into the cross and the ends of the lease sticks tied to each other to prevent one (or both) from ever dropping out and losing the cross. On the CM loom I sometimes use the lease stick holders, but on this particular drawloom there is no upper structure over the long back extension to tie them to. When removing choke ties, for example, and no tension was on the warp, two longer warp sticks from the wider CM loom were used as supports under the lease sticks, then removed when tension was again on the warp and we were ready to continue winding on.


When everything was prepared, with my son holding and applying tension on the warp bouts, I started to turn the warp beam but the warp would not move, would not flow over and under the lease sticks! I've had an occasional sticky warp before, but never like this. When I learned to make a warp, long ago, I was told "you do not handle or mess with the threads!" I could see no other choice.

So off to the computer to email the Double Harness Study Group and ask if anyone had experienced this and did they have any suggestions. Sara von Tresckow wrote saying this happens with fine warps, but it would loosen up and improve as more warp was wound on, and to try wiggling the lease sticks (which I had tried). To start, this would have to be done in small increments.


There was nothing left to do but take each inch section and pull up and push down to move the cross one to two inches, across the width of the warp, do it again and again, then wind on, and repeat, which we did, and let the lease sticks do their job of evening out tension. Kati Reeder Meek suggesting rocking the lease sticks up on edge to help separate threads, which also helped at times. Later, wiggling the lease sticks back and forth at an angle (like a flattened X) was finally allowing the cross to move, and I could move the cross forward about 18" at a time.


The two photos above, taken early on in the beaming process, show this lovely, fine, 20/2 cotton warp, purchased not long ago from drawloom weaver Nastche Milan. In just a bit, I'll start threading the maillons on the pattern heddles, so more photos in a day or two. When that is done, the drawcord warp ends will be tied to the pattern heddles, then thread the ground shaft heddles will be threaded, then the reed. Also to be done, at appropriate times will be add more parts to the loom, the lamms, treadles, and counterweights, and tieing up the treadles. Then, we'll see what other adjustments are needed for this to work/weave and give an acceptable (though narrower) shed.


Damask shuttles are low-profile due to the narrower shed on drawlooms. The two shuttles on the left were recently purchased from Catherine in Brooklyn (Hi!), and the three on the right were purchased from Sara von Tresckow (Woolgatherers Ltd) at the WI Sheep & Wool Festivals. I'm looking forward to stopping at her booth again this year. Meanwhile, the damask shuttles are waiting.

Tuesday, February 10, 2009

Drawloom Progress

I should be weaving, I know I should be weaving, but some days I am absolutely driven to make progress on setting up the drawloom, and that's what I've been working on again. Not long ago I had made 1,000 string (seine twine) long-eye heddles to add the 1,000 already on the loom.


A couple days ago I decided I needed to get back to making the pattern heddles. I previously had around 125 of them made, and in the last 48 hours I've made another 275 for a total of 400, 100 on each of the four pattern shaft bars. These will hold (if all are used) 2,400 threads, or 3,200 if I use all the holes in the maillons. More pattern heddles can be made if needed.

Tonight, I went back to making long-eye heddles again, this time for the opphampta attachment that is waiting to be added to the countermarche loom sometime this year. There were no heddles included when I bought it, used, and I decided again to make my own heddles. The long-eye heddles will then be able to be used on either loom as needed. When these are done, I'll begin on the pattern heddles for the opphampta weaving.

Tomorrow I'll be taking some old cords off the drawloom, to check on the condition of the long Texsolv cords that go from jacks down through ground shafts and to the lamms. Also, the cords that hang off the sides for the counterweights. As the loom is around 23 years old, some of the cords feel stiff and old, and I want to replace them next.

It's also time to order something for the new drawcord warp. I need to remove the old, and take photos of how it is on there. There are also books like "Opphampta and Damask" by Lillemor Johansson to refer to, as well as advice from a few members of the CW Double Harness Study Group who also have single unit drawlooms. The adventure continues...